How to Make a Cyanotype: A Complete Guide for Beginners
Cyanotypes, also known as sunprints, have become one of my favorite ways to slow down and create. For me, this process is an exciting way to explore nature while making calming imagery. Much like Mother Nature herself, I have learned to love the unpredictability of working with chemicals, sunlight, time, and form. If you are just getting started, here is everything I wish I had known when I began.


Supplies List
Foam brushes (these give the most even coating)
A small bowl or jar to mix chemicals (I use a flat glass jar that used to hold Aldi cheesecake)
Cyanotype chemicals Part A and B (I prefer the Jacquard set)
Hydrogen peroxide to deepen the blues
Watercolor paper or cotton fabric
Backing board and a sheet of glass (picture frame pieces work perfectly)
A sunny day or a UV light
Botanicals or transparent items to arrange on your print
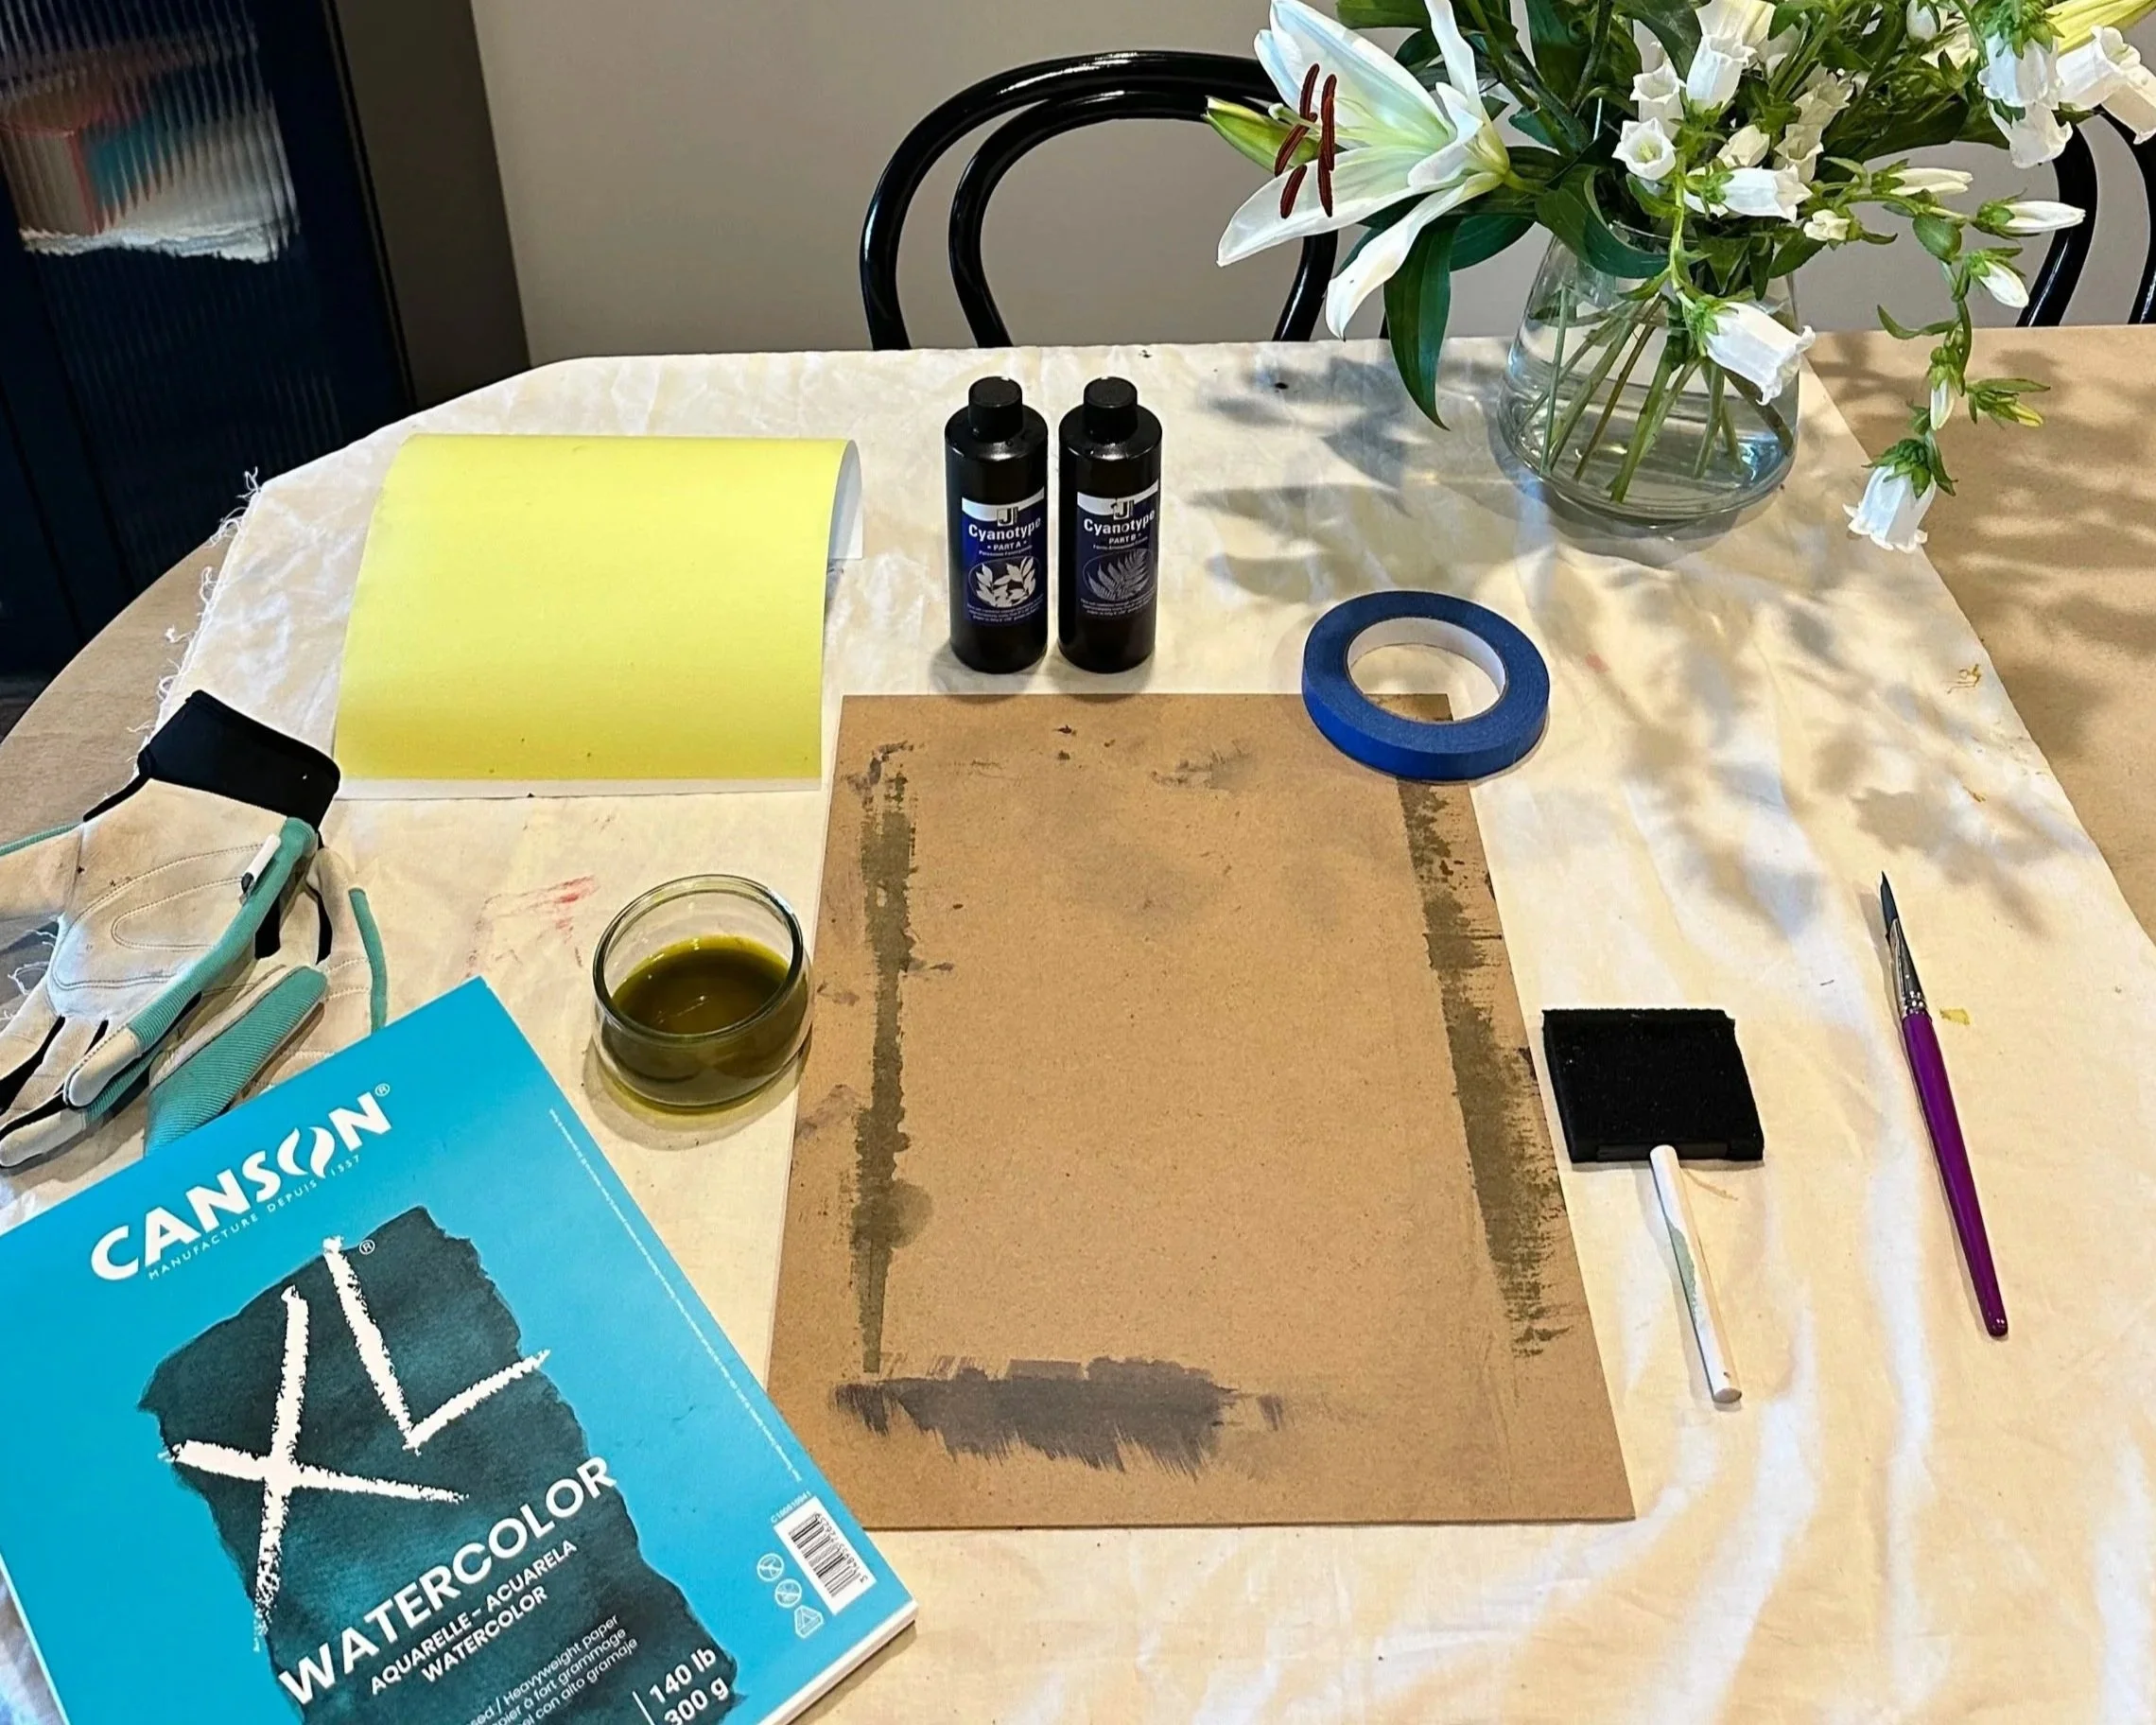
You can find most of the supplies at local art supply stores.
Preparing the Chemicals
Fill the bottles in the Jacquard set with water and let them sit for 24 hours so the powders can dissolve. Store the bottles in a dark room at room temperature.
Tip: Do not mix or fill the bottles in direct sunlight. Even a window over your sink can begin to fog the chemicals.
Making Your Paper or Fabric Light-Sensitive
Work in a dim room with no direct window light. Shake both bottles well. Fill a cap with Part A and a cap with Part B and mix them together in your small bowl.
Using the foam brush, apply a thin coat of the solution onto your paper. You can create clean edges or loose shapes around the borders. Let the coated paper dry in the dark for about 30 to 40 minutes.
If you use a hair dryer, keep it on a cold setting. A warm or hot setting can fog your chemicals. Honestly, a dark room with a fan always works better.
Tips:
You do not need gloves if you are brushing on the solution, but anything it touches will stain.
One cap of each solution goes a long way. I can coat four or five sheets of 8x10 watercolor paper with that amount.
For fabric, wear gloves and use a bucket to work the chemicals into the material. Hang it with clothespins and let it dry completely in the dark. Fabric requires more solution mix than paper, so prepare to mix
Your mixed solution only lasts three to four hours, so plan to coat multiple pieces at once.
This is a dark closet in my basement I use to dry the light-sensitive solution.
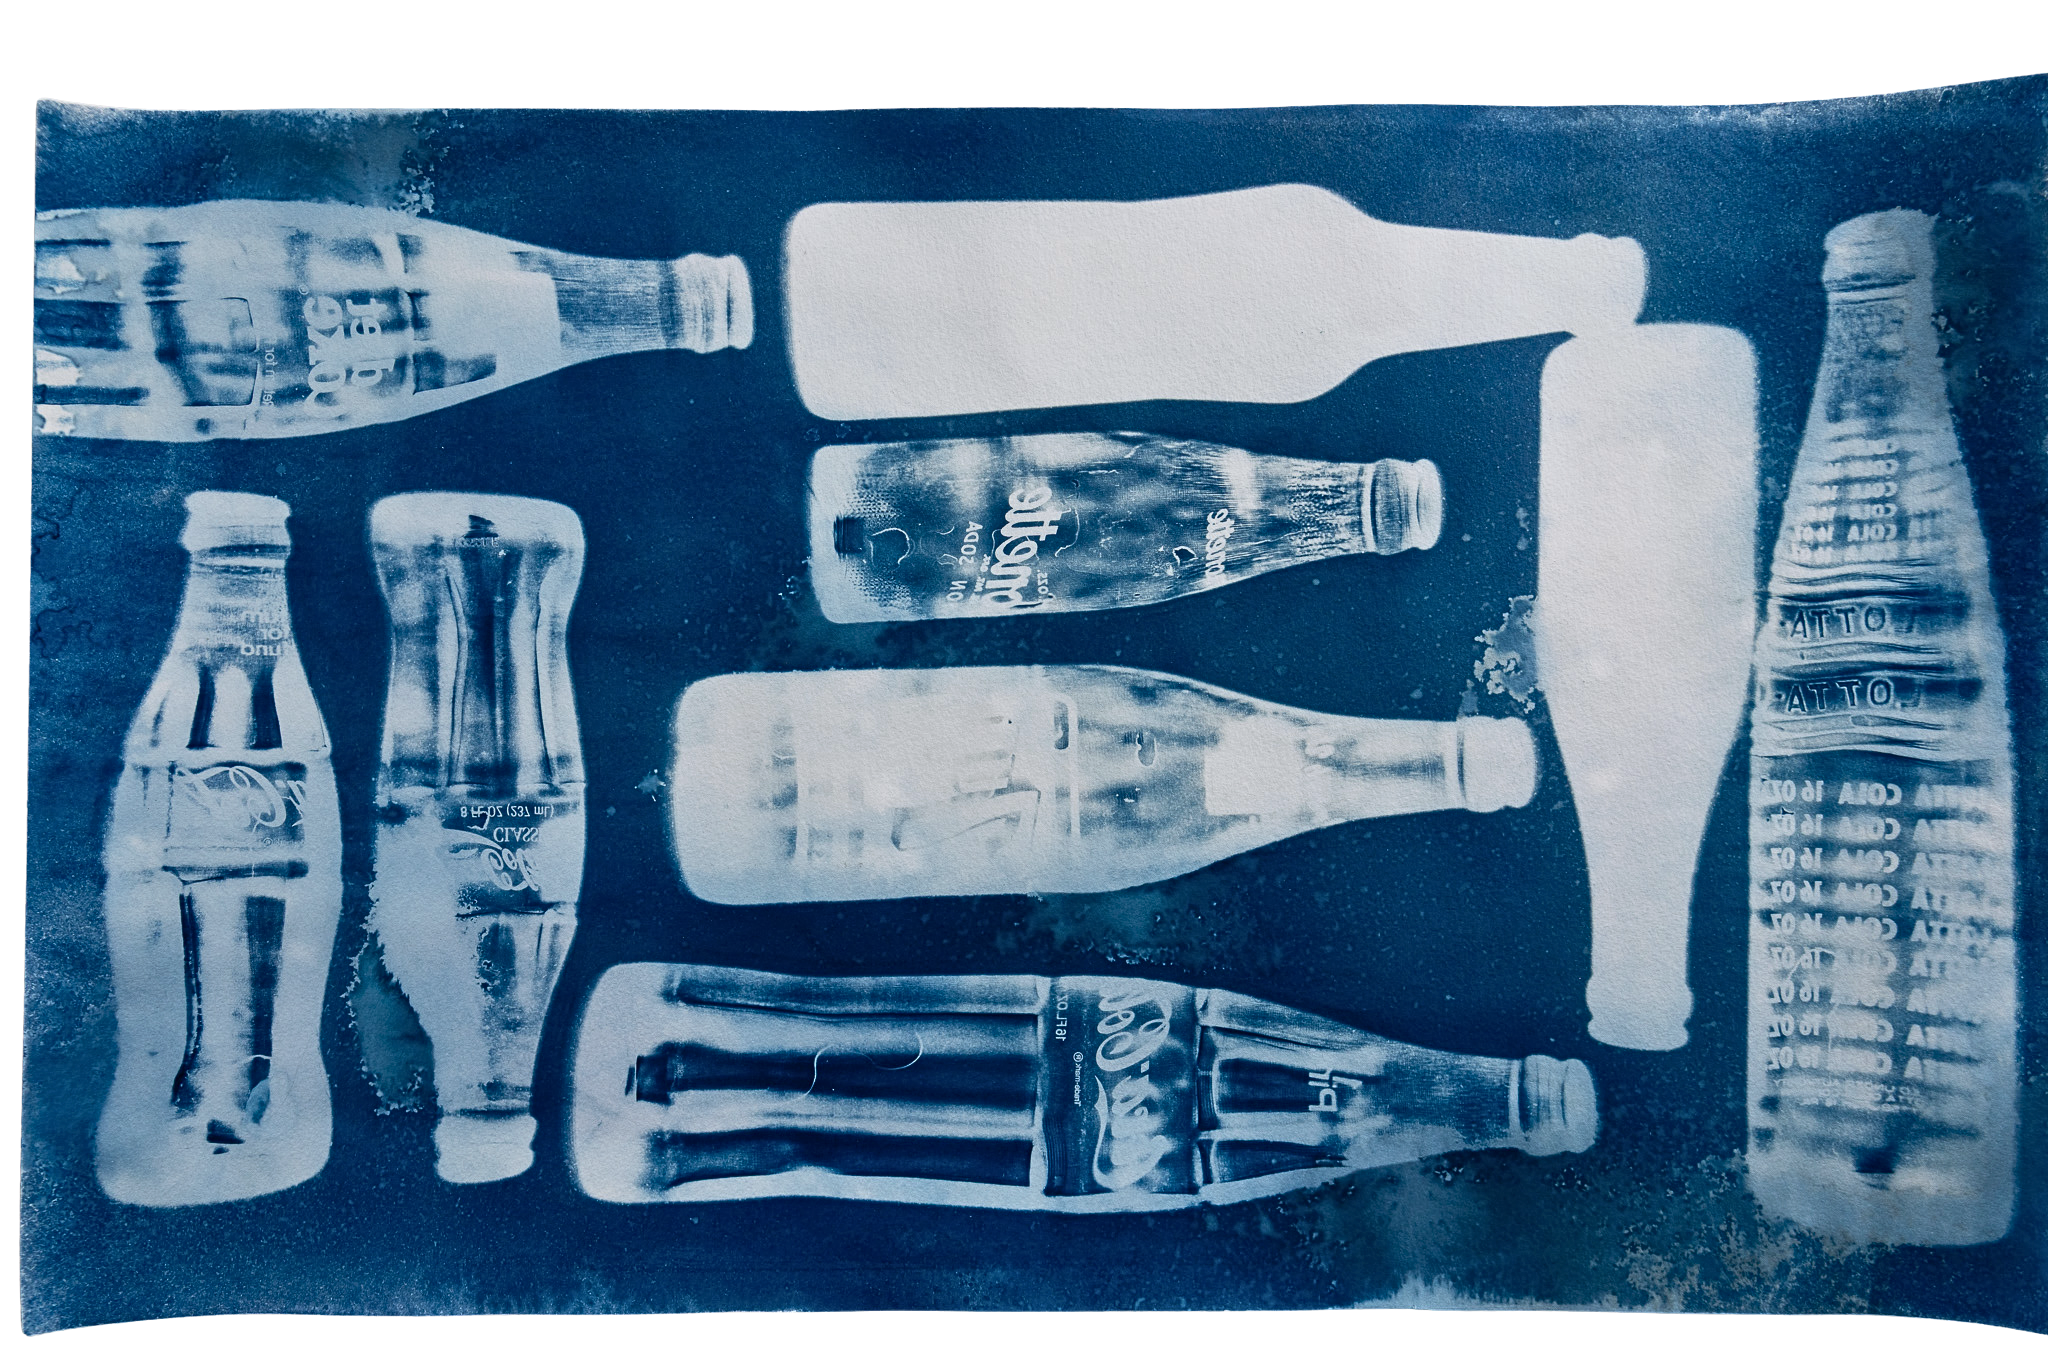
Composing Your Print
Gather your items. Some of my favorites are:
Glass objects
Flat-pressed botanicals
Saran wrap
Transparency negatives
Lay your light-sensitive sheet onto the backing board. If you left white borders, you can tape the edges with painter’s tape so they stay in place.
Arrange your objects however you like. Here are a few prompts to help you get started if you feel stuck:
Use your favorite flower and someone you love’s favorite flower
Combine something from the sky with something from the ground
Go on a walk with someone and forage together
Trust your instincts and avoid overthinking


Once your composition feels right, carefully place the glass on top. Items can slide when the glass comes down, so use a chopstick or a long, thin tool to nudge things back into place.
Using clamps, clip everything tightly around the edges so nothing shifts during exposure.
Exposing Your Print
If you are using the sun
Exposure time depends on the weather. On a bright day, 30 minutes can be enough. Cloudy days may need up to 2 hours, especially if you want deep veining in petals. Keep a notebook or write on the back of the print with details like time of day, season, and exposure time. These notes help you learn faster.

Make a test print by covering part of your light sensitive paper with a large book, then sliding the book a little every 5 to 10 minutes. This creates stepping lines of exposure so you can see the range of blues your current sunlight will produce.
If you are using a UV light
This is great for consistency. It may take longer to develop rich blues, but it gives you full control. I place my print setup inside a large cardboard moving box and cut a hole the size of my UV light. The light sits on top like a homemade exposure unit.
Tip: For multiple shades of blue, try layering items at different times. For example, add one pressed flower every five minutes to create a gradient from light to deep blue.
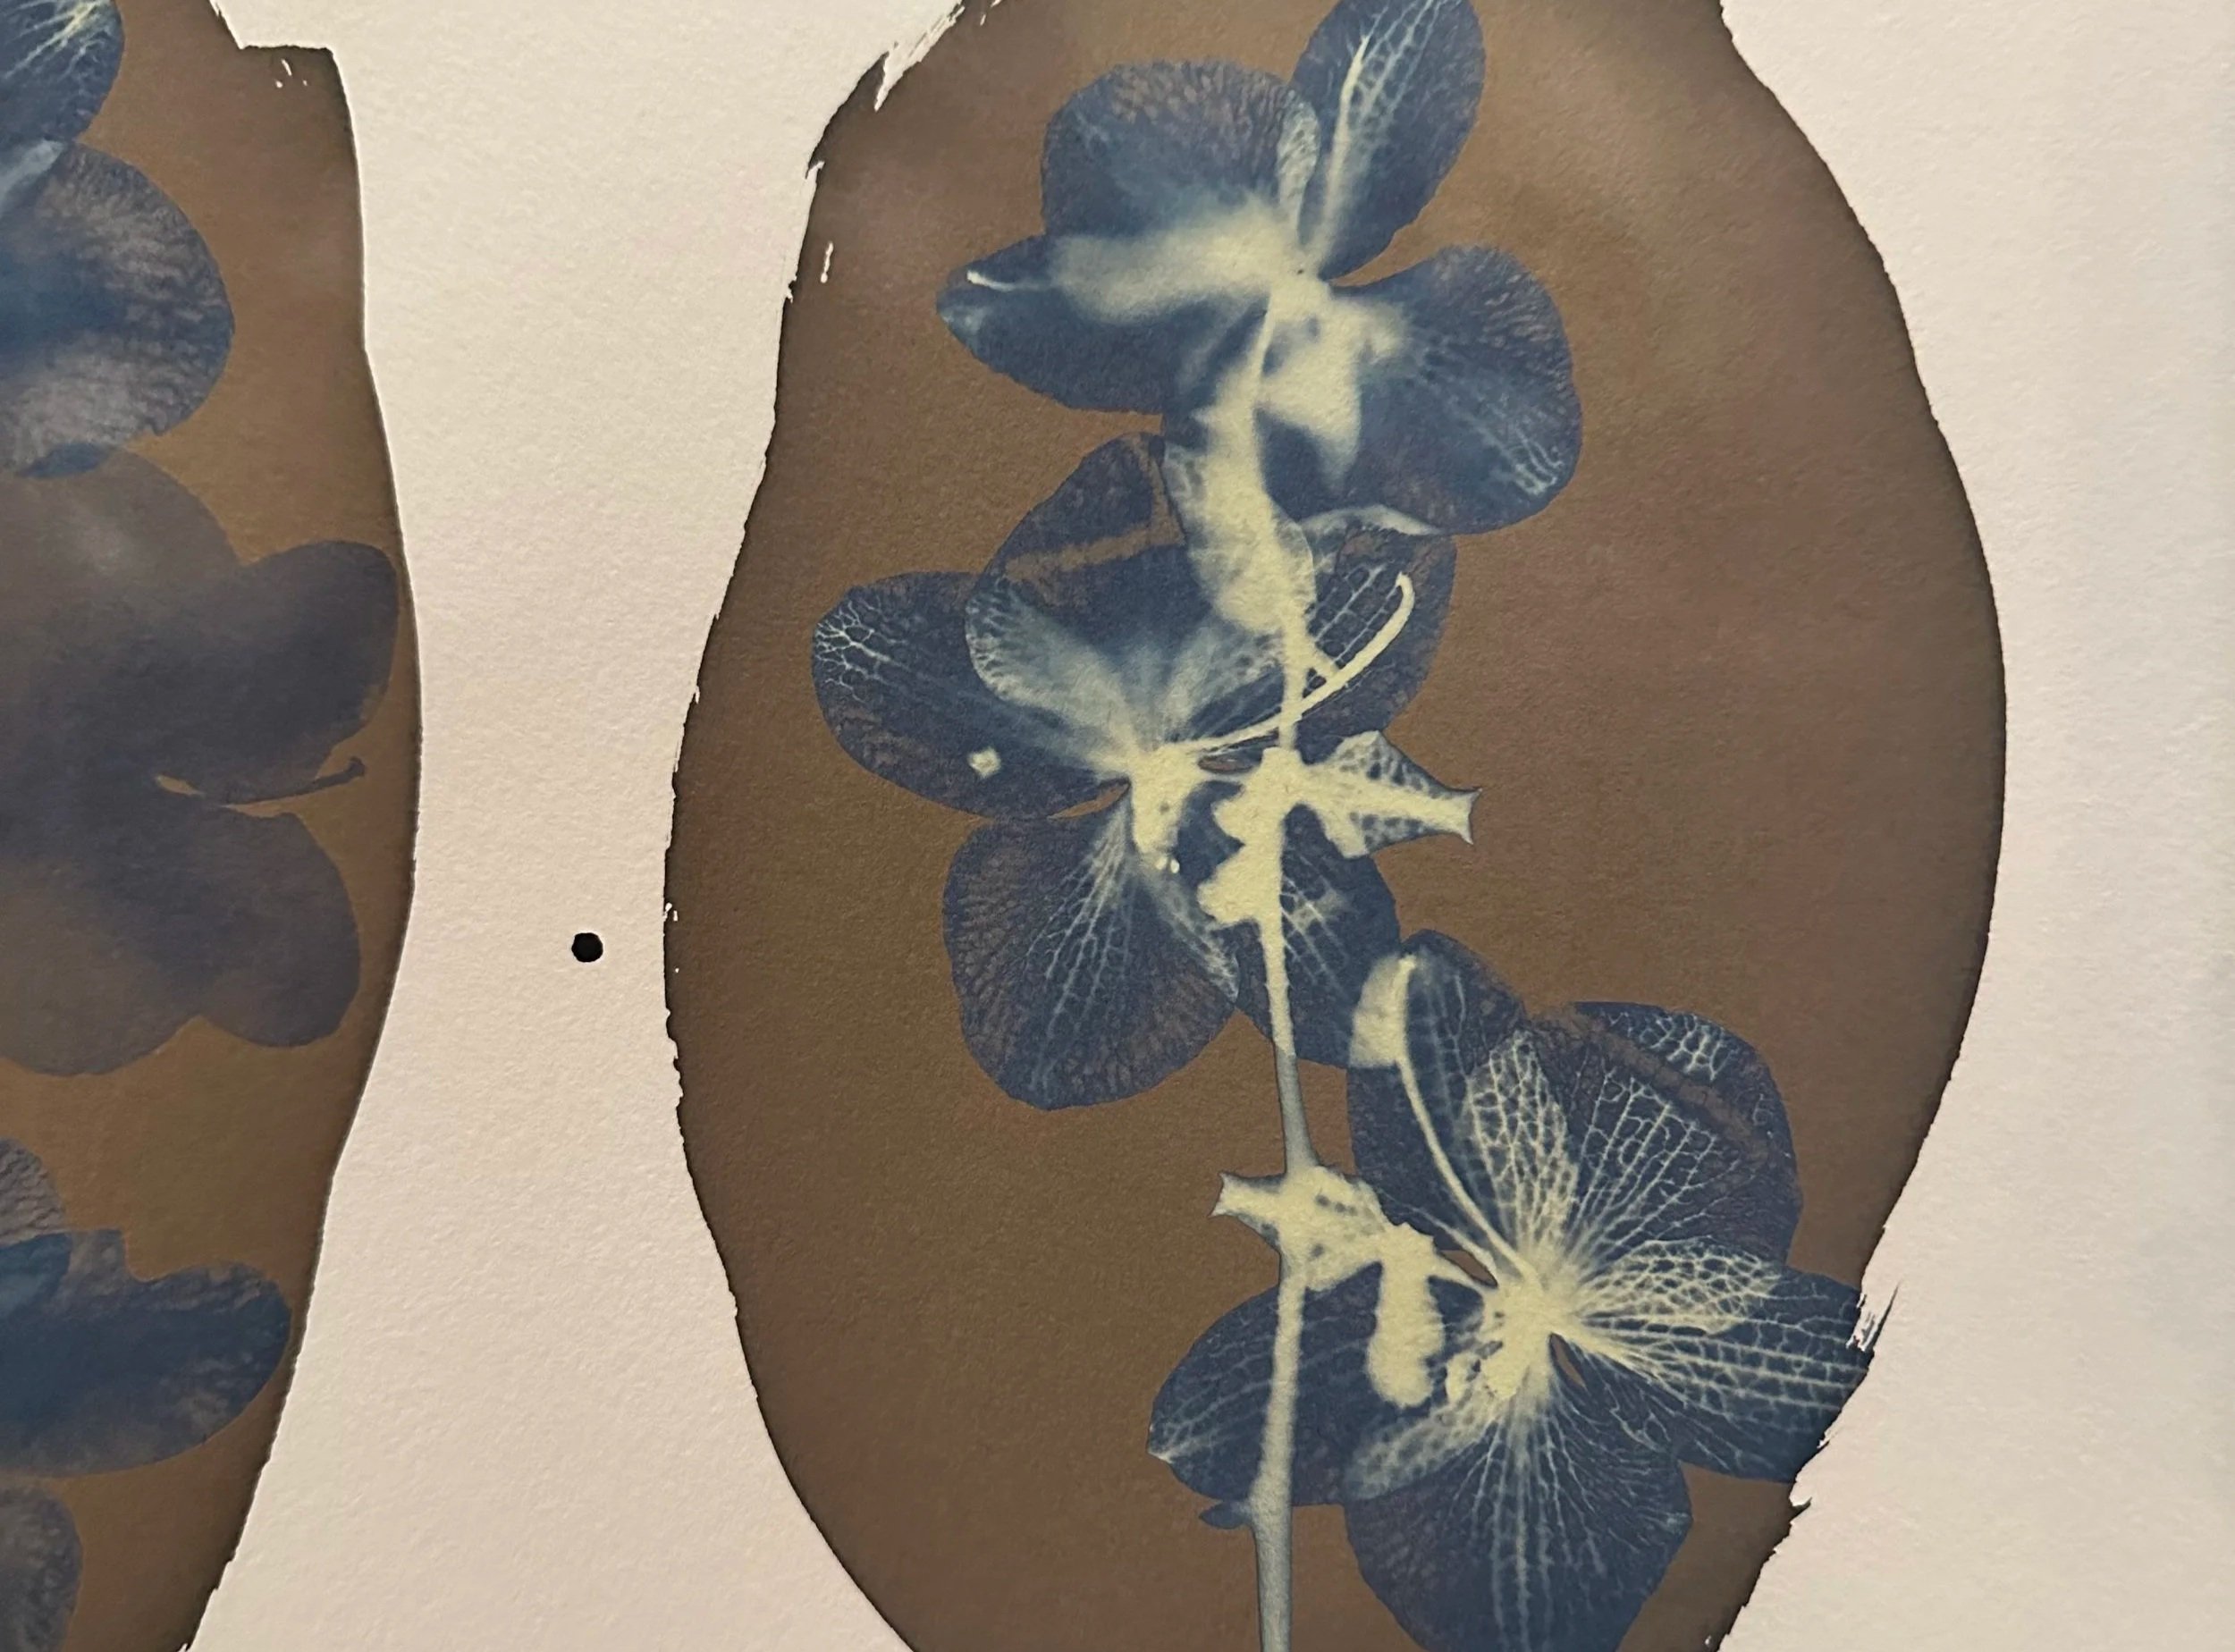
This is what a print should look like before it’s fixed in a bath. Look for a copper color.
Fixing Your Print
Fill a sink, tub, or large container with cold water. Add a cap of hydrogen peroxide to help bring out darker blues.
Place your print in the bath for five to ten minutes.

If you still see yellow in your print after the fix bath, it needs a longer soak and refreshed water. Too much soaking can cause your print to fade.
Let the print dry completely. I sometimes use paper towels to gently dab the surface so it dries faster.
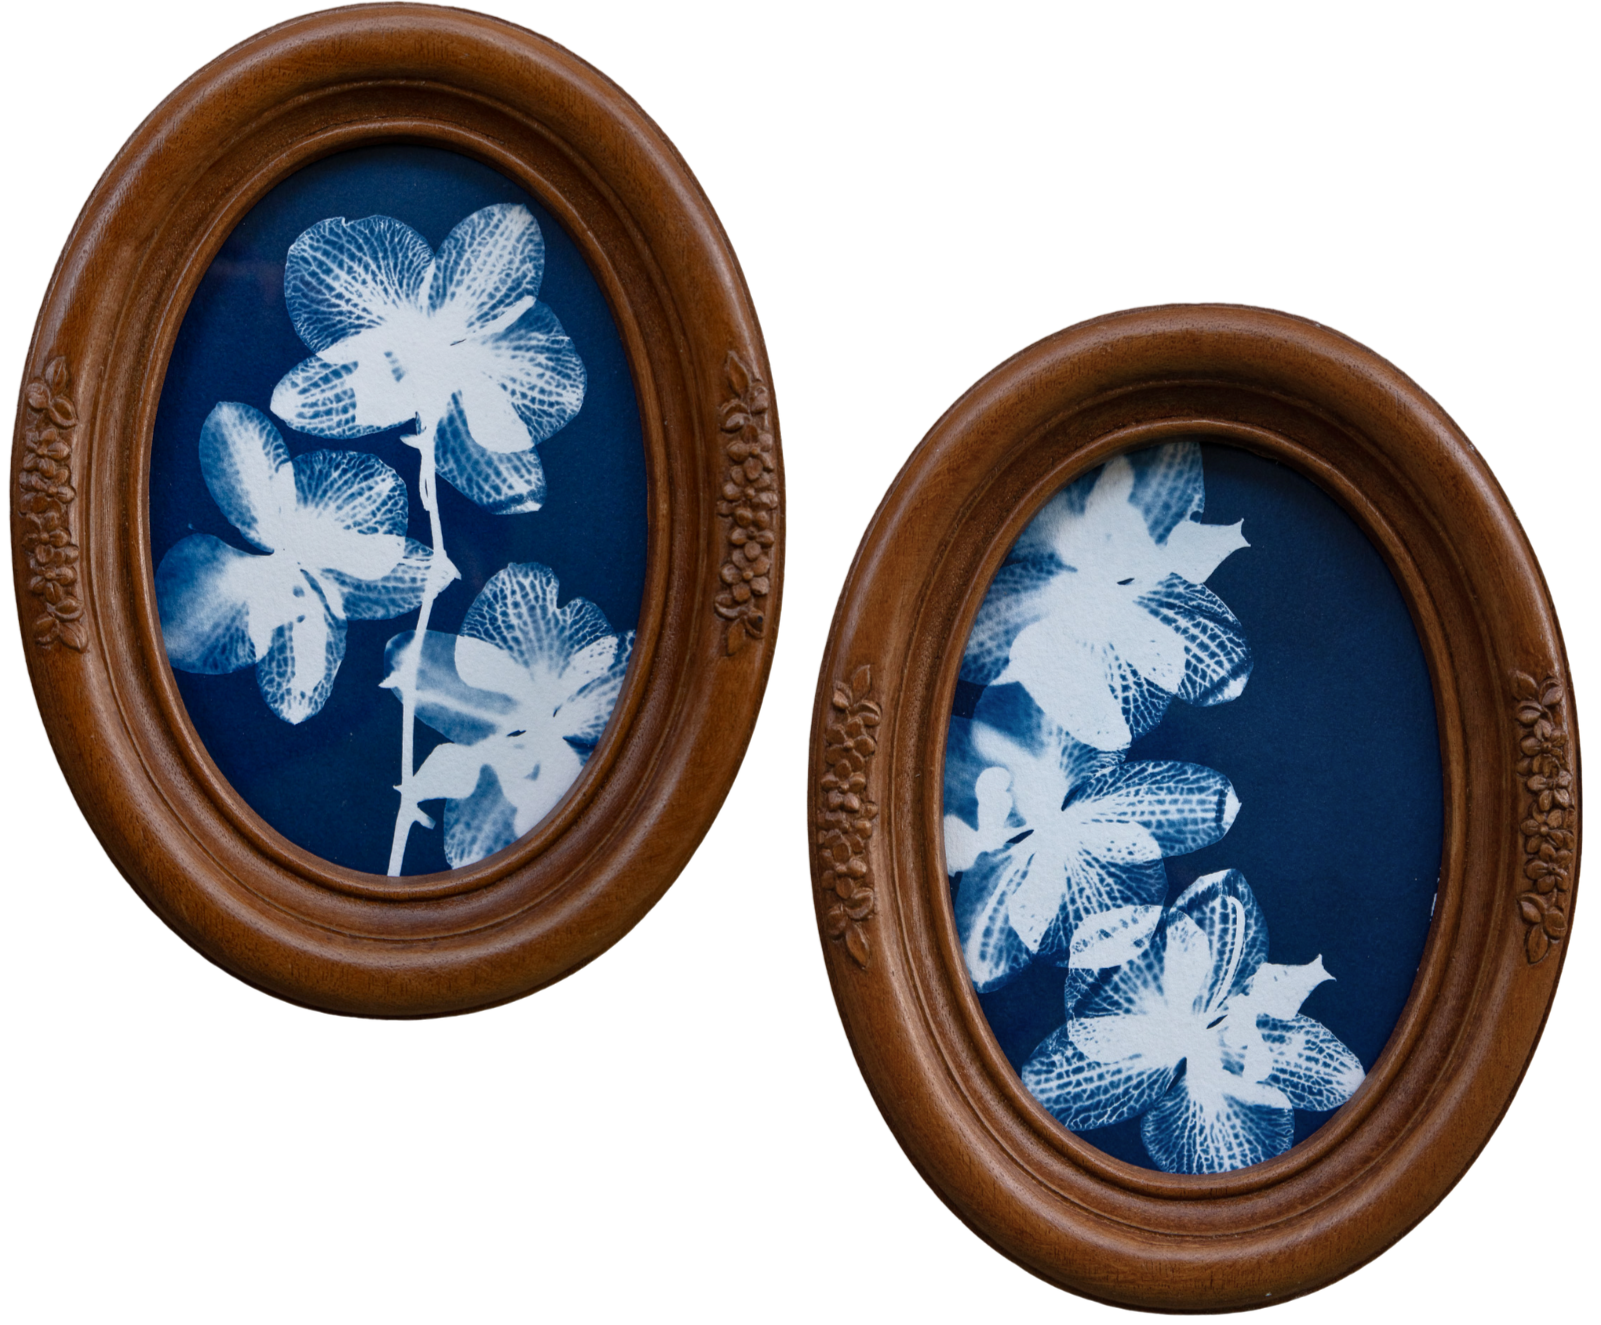
And just like that, you have a finished cyanotype. Each one is different, and there will always be surprises. That is the magic of it. Some prints will turn out better than you imagined, and others will teach you what to try next time.